6 Video Tools to Ignite Your Social Marketing
My very first article for Social Media Examiner has been published and has been shared over 6,300 times thus far!
In this article I share some of my favourite video tools which have helped me ignite my own social marketing.
LISTEN
You can also listen to the article produced by Social Media Examiner.
Do you want to bring more pop to your social media marketing?
Looking for video tools to help?
The right tools make it easy to create engaging video content.
In this article, you’ll discover six tools to create and improve your social media videos.
#1: Animoto to Create Video Compilations
Animoto allows you to create professional-quality videos with pictures and video clips. There are both free and paid versions of Animoto. Pricing plans range from $8 a month for personal use to $34 a month for businesses.
Here’s how to get started with Animoto. First, sign up for a free account. You can create your free account with your Facebook profile or with your email address.
Then click the Create button to start your Animoto project.
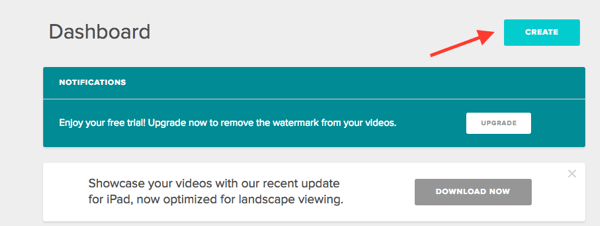
Create your first Animoto video from the dashboard.
Next, choose a style to customize the look and feel of your video. Click on the style template preview to see what your video would look like with that style.
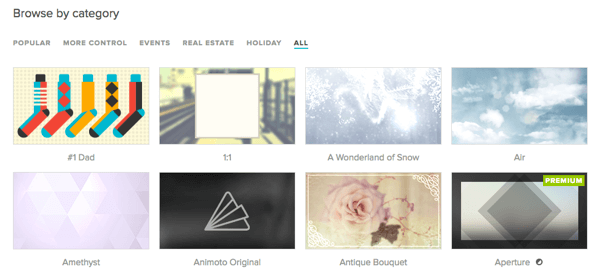
You can preview styles before applying them to your videos.
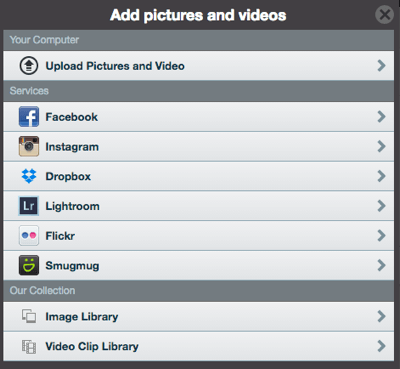
Now you’re ready to add photos, video clips, and music. Animoto accepts photo and video uploads from your computer, smartphone, or other sources including Facebook, Dropbox, and Photobucket.
You can add your own song or select one from Animoto’s music catalog. Tracks available include instrumentals and songs.
Be sure to check Animoto’s submission terms before uploading a photo or video.
Now you’ll want to personalize your video in Settings. Be sure to add a custom thumbnail, video title, and description for your video. All of this information helps with search engine optimization.
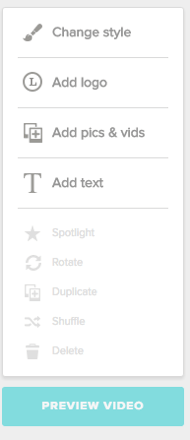
Preview your video so you can fix anything that’s not perfect.
When you’re finished, you can preview your work. Click the Preview Video button to see what your video looks like. If you want to make changes, close this window and make any required edits.
Finally, you’re ready to produce your video. To do this, click Produce.
![]()
When you’re finished, click Produce.
Expert Tip: If you decide to choose music from another source (such as SoundCloud or YouTube), ensure you have full rights. You may be breaching copyright laws if you don’t fully check the music ownership and third-party sharing rights.
#2: Legend to Build Custom GIFs
GIFs are images with movement. While there are apps that offer premade GIFs, consider customizing your own. This personalizes your brand and allows you to create unique content.
Legend is a smartphone app that allows you to create GIFs by combining text, flash, and images. You can download Legend from Google Play or the App Store.
Here’s how to use Legend to create your own branded GIFs. First, type your text. You have 100 characters to work with.
First enter your text.
Next, choose a photo. You can take a photo using the camera on your phone, choose a photo from your photo library, or select a photo from Flickr.
Now it’s time to select your animation style. There are 18 variations to choose from, six on each screen.
Legend offers 18 animation styles to choose from.
When you choose your color palette, it changes the color of your photo and your text. Then tap GIF to convert your work into a GIF and tap More to save it to your camera roll.
Play around with the color palette to see how it changes your photo and text.
You can share your animated GIF on Instagram, WhatsApp, or in a text message from the Legend app. You can also share it directly from the app to other social networks if you’ve already downloaded the apps to your smartphone.
Expert Tip: Make Legend GIFs in bulk and save them to your camera roll to share later.
#3: Relay for Snapchat Video Geofilters
Relay is a graphic design and publishing tool for people who aren’t graphic designers. You can use Relay to design your own customized Snapchat geofilters, which you overlay on your videos. Geofilters act as a personal branding tactic for your Snapchat stories, which lead to greater engagement. Relay provides a Snapchat geofilter template layout of 1080 x 1920 pixels.
You can sign up for a free Relay account and try out a demo for 14 days. For pro features, it will cost you $12 per month or $96 per year. Paying for the whole year up front gives you four months free.
Here’s how to create a custom geofilter for Snapchat using Relay. After you create a Relay account, click Projects at the top of the screen and select New Project from the drop-down menu.
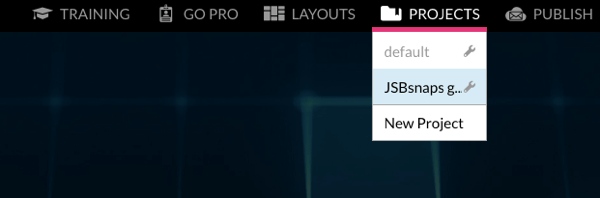
To get started with Relay, click Projects and then select New Project.
Next, you’ll need choose your layout. Click Layouts at the top of the page, and then on the next page, choose Snapchat from the Platform list on the left.
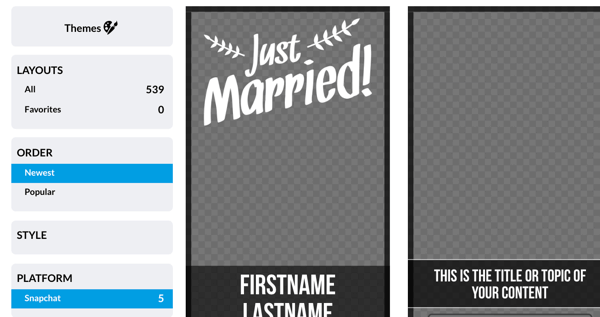
Relay can work with all of the social media platforms.
Edit the template by customizing the colors, text, and logo.
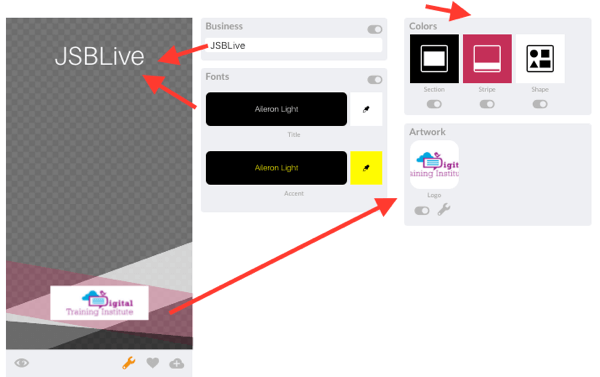
Relay templates are highly customizable.
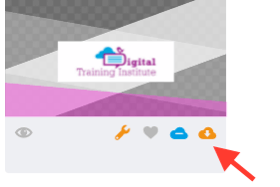
Click the cloud icon to save your design.
Click Publish when your project is ready.
Then click Publish at the top of the page to publish it.
Expert Tip: Create your own Snapchat geofilter for your event.
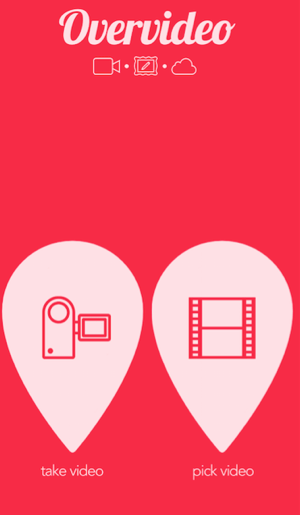
#4: Overvideo to Add a Soundtrack
Overvideo is a free iOS smartphone app that lets you add text and music to your videos.
To get started, download the Overvideo app and open it on your iOS device. Thenchoose a video from your camera roll or capture a new video.
Overvideo is a free iOS app.
Add text and images to your video. You can increase or decrease the size using the scrollbar.
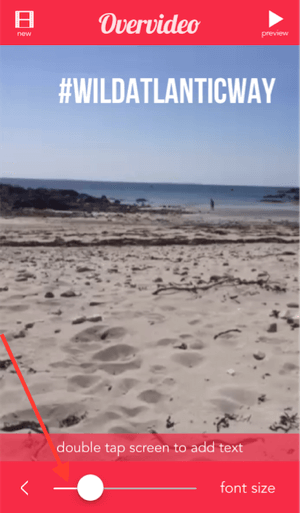
Control font size with the slider.
Next, you can add music to your video. Overvideo can access the music library on your device. Finally, save your video to your camera roll. You can also share it via email or on Instagram.
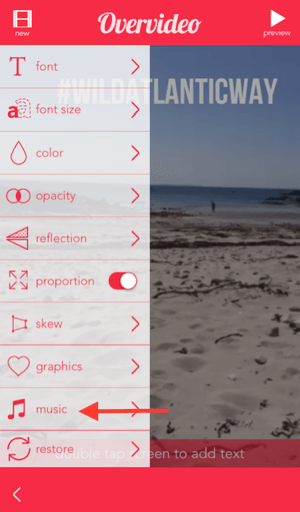
Overvideo can use music from your device.
Expert Tip: Capture short video clips when you’re at events, attending business meetings, or working. Use Overvideo to elevate the engagement potential of your video with music and quirky captions.
#5: Cinemagraph Pro for Facebook Profile GIFs
Facebook now allows you to upload video profile pictures. You can replace static profile photos with a 7-second looping video called a cinemagraph.
Cinemagraph Pro by Flixel (iOS or Mac only) is an easy-to-use tool to get movement in your Facebook profile photo. Flixel offers a free trial and a paid version for $15 per month. This tool is popular among photographers and graphic designers.
To get started making your cinemagraph, first decide what will be moving in your video. It could be your hair blowing in the wind, a tear from your eye, or simply blinking. Then use your smartphone or a digital camera to record your clip. To make sure the clip is perfect, you may need to record it a few times.
Next, edit your video in Cinemagraph. Edit the video to the desired length, looking at the motion you want to repeat in a loop. Then mask the portion you want in motion using the paintbrush tool.
Export at least 6 seconds of video.
Next, set the loop type, speed, and crossfade. You can also add a filter for extra effect.Export at least 6 seconds so that your video fits in the 7-second timeframe. Finally,upload your cinemagraph to your Facebook profile.
Expert Tip: Study cinemagraphs in detail and decide what movement you want in your photo. This will make creating your cinemagraph much easier.
#6: GoAnimate for Video Presentations
With the GoAnimate animation tool, you can create videos that are made up of template scenes, customizable characters, backgrounds, music, and props from their library. You can also upload your logo and change the colors to match your brand.
GoAnimate has both free and paid versions. You can try a free 14-day demo, but you can’t download or export your video because it will contain the GoAnimate watermark. But it’s a great opportunity to test-drive the software.
Choose a Theme
To create a video in GoAnimate, first sign up for an account and then click Make Video. Next, select your theme. You have three choices: Business Friendly, Whiteboard Animation, and Video Infographics.

GoAnimate guides you the whole way with easy-to-follow graphics and instructions.
Then select your template in Video Maker. Each template has a series of premade scenes with backgrounds, characters, props, and text boxes, which you can edit individually.
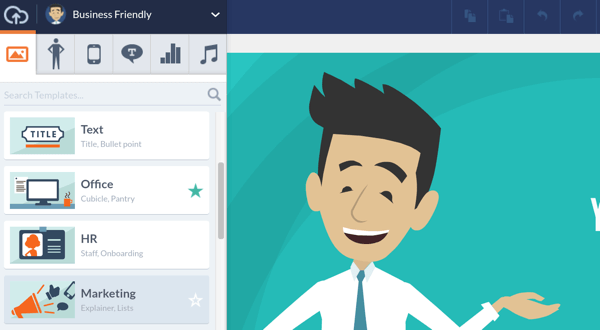
Templates help tie your project together.
Choose your character by category, from holidays to kids, politics, and sports. Remember to keep your character consistent throughout each scene.
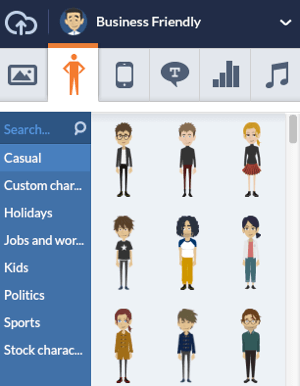
Characters come in all shapes and sizes, not to mention context.
Next, select props to enhance your video storytelling. You can move props around each scene freely.

Props add interest to your animation.
You can also add text or text bubbles to each scene where relevant. Choose your font and speech bubble type. Move your text around the scene as necessary.
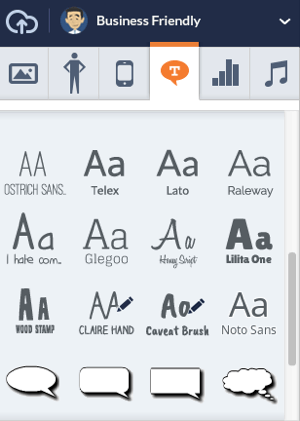
Use text and text bubbles strategically to further your story.
Do you have relevant data to include in your video? Use vidgets to depict data and figures. These graphics are useful if you’re communicating increases or decreases, percentages, or statistics.
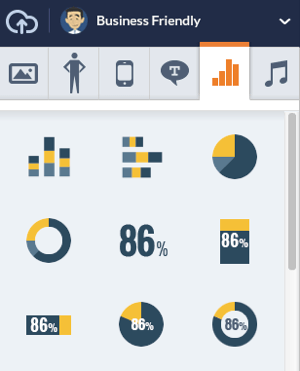
It’s easy to integrate data and figures, called vidgets, into your video.
You can also add dynamic text to your scenes, such as text coming into the screen vertically or horizontally or whiteboard animation.
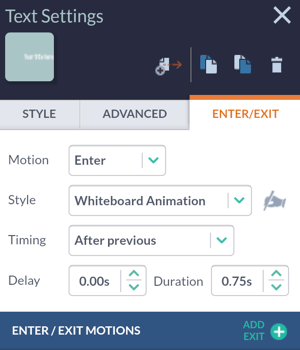
GoAnimate also includes text effects.
Add Scenes
Now it’s time to choose your scene. In the image below, a template scene was selected for the title slide for a video. On the right, you can modify the text. Click the Add Scene button to insert additional scenes.
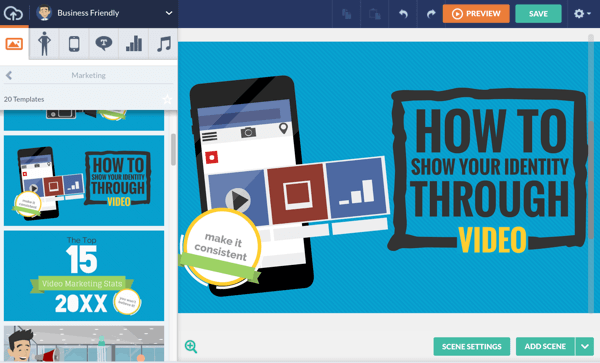
The number of scenes you choose will determine video length.
You can also set your scene duration. For example, if you’re making a 30-second video with six scenes, each scene may be 5 seconds in duration.
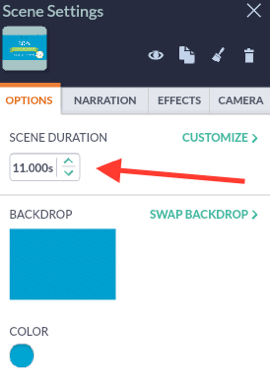
You can set the scene duration.
You can edit the duration for each scene at any time by extending or reducing the edges of your scenes within the row with the video icon.

Play with scene duration to get a suitable pace for your video.
Add a Voiceover
Next, you can add voiceover to your scenes. There are two ways to do this: with dialogue or narration. Dialogue applies to characters only and comes with automatic lip-sync. Conversely, narration is voiceover without lip-sync.
To add a voiceover to your video, use your built-in microphone to record your voice, upload a recording, or use one of GoAnimate’s professional voiceover partners(VoiceBunny, Buyvo, and Voices).
Tip: Use text-to-speech (TTS) as a placeholder before adding a human voice to ensure you have your audio in the right place.
It’s easy to drag and drop sound files within GoAnimate. You can import multiple types of audio formats, such as MP3, WAV, or M4A formats. (Note: the individual sound file limit is 15MB.)
Customize Your Character
Now it’s time to get into character. You can customize your character with character creator; specifically your character’s gender, body, hair, clothing, facial expressions, and accessories. You can even create a character that looks like you.

Customize characters down to their facial expressions and clothing.
Add Music
Who doesn’t like a little music? GoAnimate features a library of royalty-free music to choose from. Click on the music icon to audition tracks. After you choose a music track, it appears below your scene and narration rows.
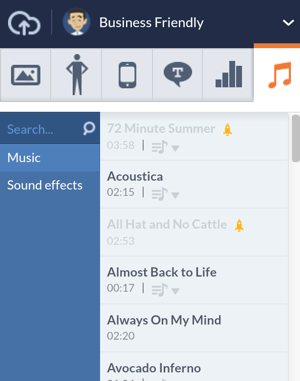
Any music tracks you add will appear below the scene and voiceover rows.
Save and Share Your Video
When you’re finished with your video, click Preview in the upper-right corner of the page to preview it. This is important, because you might spot errors or areas for improvement. You also get to test your audio.
After you’ve previewed your video, click Save Now to save it.
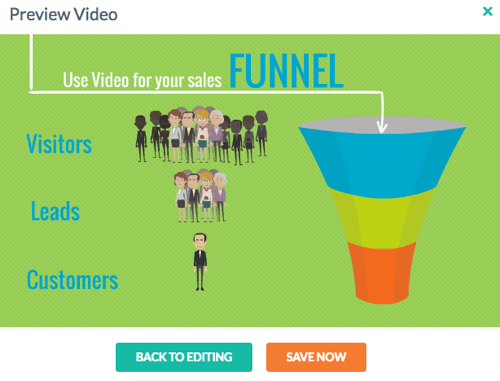
You can save your video or go back to editing it. It’s always a good idea to save your video as you go.
In the pop-up window, fill in the video title and add tags and a description to help optimize your video for search engines. You can also select whether to save your video as a draft, make it private, or make it public.
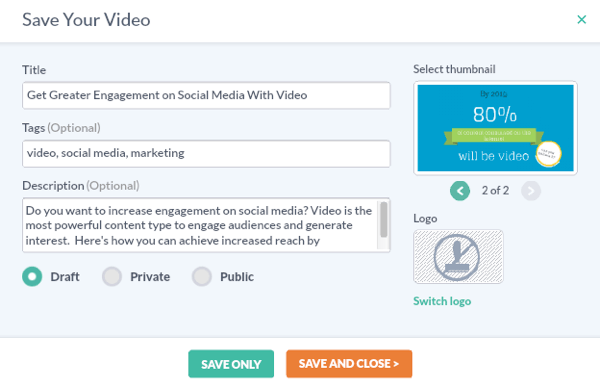
Fill out these fields to ensure your video is search-engine optimized.
Next, you have the option to export and share your video on social media or send it via email.
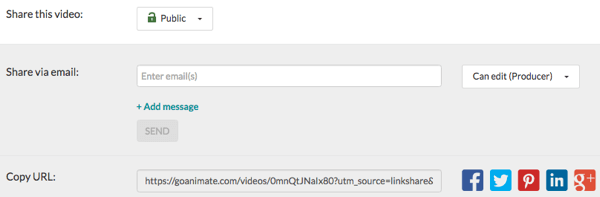
Sharing your video to your social channels is easy!
You can also export your video to other video-sharing platforms.
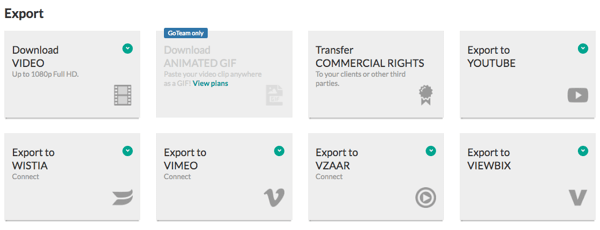
You can also share your video to a wide array of outlets.
Expert Tip: Every aspect of your GoAnimate video is fully customizable from the colors and fonts to the images, characters, and audio. Personalization is key for social media engagement.
Conclusion
These six great storytelling tools will make it easy to integrate video into your social media marketing. Take note of current engagement rates on your social networks and benchmark these against the results after integrating video. The deliberate bias towards video in many algorithms will benefit savvy social media marketers who use tools like these.
What do you think? Have you tried any of these tools to create video for your social channels? What tools do you use? Please let me know in the comments below!

jeff thomson
Thanks for such useful tool list my favourite one is goanimate it is greatly animated video maker it’s easy and have so many features
Scarlett
Hey Joanne! Thanks for the nice article, It’s very helpful and the points and tools you have mentioned are amazing and worth reading.
Scarlett
Also, Online video marketing requires such tools and techniques.